Category: Fun Science Activity (Page 79 of 112)

Weekend Science Fun: Glowing Chemistry

Once again, our weekend science fun is inspired by a children’s book. As announced today, the winner of the 2009 Cybils award for nonfiction picture book is The Day-Glo Brothers by Chris Barton
 and illustrated by Tony Persiani. If you are interested in children’s and young adult books, you might want to see the winners in all the categories. I reviewed The Day-Glo Brothers at Wrapped in Foil this week.Day-Glo
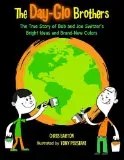
The Switzer brothers, Bob and Joe, were fascinated by science, probably due to the fact their father was a pharmacist. Their interest in glowing colors started when Bob had a bad accident which kept him confined to home. His brother Joe kept Bob company by playing around with an ultraviolet lamp (also called a black light). Joe, a magician, realized he might be able to use fluorescent paint and ultraviolet light to create an illusion, so the brothers began to experiment.

Knowing that there were commercial uses for fluorescent paints, the brothers started to investigate paints that would glow in regular daylight, not just under ultraviolet light. They eventually created the eye-popping Day-Glo colors found today in products as diverse as highlighters and traffic cones.

Let’s do some investigations with glowing light sources of our own.

1. Glowing under ultraviolet light

Gather:

  • a black light
  • petroleum jelly
  • paper
  • tonic water
  • kitchen or latex gloves (optional)

Here in Arizona, black lights are easy to obtain from virtually any hardware or home supply store, and for a good reason. It turns out that one of the best ways to find scorpions, which are active at night, is to shine an ultraviolet light on them. Scorpions glow under UV light. For those of you who are curious, Firefly Forest has a great photograph of a glowing scorpion.

How Stuff Works (site has ads) has an explanation of how a black light works.  Under normal conditions humans can’t see ultraviolet light, but when ultraviolet light from a black light hits certain objects it releases forms of light that we can see.

Turn off the lights at night, and explore with the black light. What glows? Turn the lights back on and write a simple message in petroleum jelly on a sheet of paper (using the gloves if you don’t like the feel of the jelly). What happens when you turn the lights back off? What happens if you get petroleum jelly on your hands? Take a look at the tonic water and other household items under the black light, too.

For more black light science experiments, check Home Chemistry.

2. Light sticks

Light sticks can glow in the dark without being exposed to light or ultraviolet light to work. The light they give off is the result of a chemical reaction. How Stuff Works has a section about how light sticks work.

You can experiment by comparing the speed of the reaction when you activate a glow stick in warm water versus ice water. You’ll need a timer to time the reaction.

Steve Spangler has a video about light sticks and glowing.

3. Day-Glo Bugs

Entomologists who want to study insect movement sometimes use Day-Glo powders. They mark a group of insects with the bright powder, release them and then recapture the insects after a given period of time, to see where they ended up. This type of experiment is called a mark-recapture experiment. Insects may be recovered with simple equipment, like a butterfly net, or elaborate collecting equipment, such as a huge insect vacuum.

Get some glowing insects, hide them and let the children “re-capture” them.

4. Glowing plastic stars

Younger children love the glowing plastic stars. Use them to create constellations, patterns, etc. My son used to enjoy throwing light-charged plastic stars into the bathtub water and turn off the lights (briefly and with adult supervision). It was fun to see the stars swirl through the water.

Have fun. Who knows where an interest in light and chemistry will lead next?

Disclosure:  As a round II Cybils judge, I received a copy of this book for review purposes.

Weekend Science Fun: Count Some Birds

The 2010 Great Backyard Bird Count is coming up next weekend, February 12-15. This is a wonderful opportunity for children to participate in a science project where the data they collect really “counts.” 🙂image_preview

Even if you don’t know a house sparrow from a chickadee, the site has some good information about birds, checklists of birds found in your area, and instructions about data collecting. There is also a list of related backyard activities you can do. Best of all, it’s free!

Our family will be participating, because my son is an avid birder. He is also a bird photographer, so he may take part in the photo contest. Note:  photos must be taken during the count weekend.

hawk_2

burrowing-owl2_2burrowing-owl

Aren’t burrowing owls cute? (Now, why can’t I take photos like that? :-))

If you and your family take part in the bird count, we’d love to hear about your experiences.

For more information, try these books:

Weekend Science Fun: Inspired by Ants

This weekend I’m doing related posts on all three of my blogs, all inspired by a new children’s book, Little Black Ant on Park Street by Janet Halfmann and Illustrated by Kathleen Rietz, part of the excellent Smithsonian’s Backyard series. At Wild About Ants, I just posted about the biology of the little black ant. I also posted a review of the book on my Wrapped In Foil Blog. Here at Growing With Science let’s explore some hands on activities to reinforce learning about ants.Little-black-ant

1. Build an Ant Using Marshmallows and Toothpicks

Gather:

    • close-up photographs of ants
    • marshmallows, big and mini
    • toothpicks
    • information on ant anatomy (Ask-A-Biologist at Arizona State University has an excellent resource on Ant Anatomy, with accompanying activity sheets)

(Edit: Now go to the link and download the “Ant Farm” .pdf for ant-related activities as well.)

Important Note:  Ant anatomy is actually more complicated than for most insects. In general, insects have six legs, three body parts and one pair of antennae. Ants, however, are unique in some ways. Many, many children’s books about ants may list their three body parts as head, thorax and abdomen, without taking into account how ants are special. When adult ants are developing their lovely thin “waists” within the pupa, a bit of the true abdomen gets pressed up against the thorax, and the rest of the abdomen becomes the waist and the hind section. When scientists realized this, they thought,  “Hum, we can’t really call that middle section a thorax, if it’s really a thorax and a bit of abdomen pushed together. And we can’t call the back section an abdomen if it’s only part of the abdomen… so we’ll call the middle part a mesosoma, and the back part a metasoma or sometimes gaster. The thin part between the mesosoma and metasoma/gaster is called the petiole. The head is still a head. 🙂

You might want to decide ahead of time whether you are going to expect the children to make an accurate representation of an ant, in which case you’ll need to go over the anatomy first, or whether you are going to let them do ant “sculptures.” I admit I tend to go for letting the children express their own vision of what an ant looks like (including putting the legs on the metasoma, having eight body parts, etc.).

marsh-ant

Generally after experimentation and eating many of the trials, your child may reach something like this.

marsh-ant2

The child may even notice that the antennae are bent, like elbows in arms. This example was made by an older child who had studied ants before.

2. Gatekeepers to the Ant Colony – exploring our senses

Little Black Ant on Park Street talks about the little black ant guarding the door to keep out strangers. This activity allows children to investigate entrance guarding in ants.

This activity works best with a group.

Gather:

  • small, opaque containers or vials, for example old film canisters. Apply masking tape to the outside if you can see through it
  • cotton balls
  • scents such as vanilla, root beer and/or peppermint extracts, lemons, flower scented perfumes and/or bath oils

Place a cotton ball in each container. Try to prepare at least one container for each person participating. Add a small amount of scent to the cotton ball and flip it over in the container, so there are no visual cues as to the scent’s identity at the surface. (Otherwise the children can guess from the color, for example, vanilla is brown.) Make at least a third of the containers with the primary scent, such as the vanilla. That will represent the colony odor of the nest, and anyone with that scent will be nest mates. Add one scent per container to the remaining vials. Smell each one to make sure you can detect the odor. (I recently prepared a batch and didn’t check them. What I thought was a lemon scent did not come through at all. Lesson learned.)

Pick one or two children to guard the entrance of the ant colony. Give them each a canister with the primary odor, but don’t tell them what it is. The guards will smell each ant (child’s container) who wants to enter. If the smell of the entering child’s container matches that of the guards, then the child is a nest mate and can enter. If the odor doesn’t match, then the entering child is an intruder and the guards should block him or her from entering. If you make enough containers several children can take turns being guards, and being let in or excluded.

As you can see, there are a lot of fun projects to do with ants. I would love to hear about how your projects turn out or if you have some fun science experiments with ants.


(Affiliate Link)

This book was provided by the publisher. I had already purchased others in the Smithsonian’s Backyard series.

Related:

You might also want to try observing ants and a growing list of more ant books for kids at Science Books for Kids.

« Older posts Newer posts »