Category: Biology (Page 30 of 40)

Weekend Science Fun: The Human Body for Kids

Our post this weekend is inspired by a new book, Inside the Human Body by Dr. Aron M. Bruhn, M.D., with illustrations by Joel Ito and Kathleen Kemly. 

Starting with the parts of the cell, the first two pages look like any other nonfiction book.The surprise comes when the pages fold out to a 35-inch long illustration of a human boy with many different organs labeled. The illustration is detailed and tastefully done, so that the boy looks healthy and lively. There are nine other fold out sections throughout the book.

On the following pages come the skin, nervous system, senses, and digestive system. Traveling through the excretory system, muscles, and respiratory system, Dr. Bruhn then explains bones, the immune system, hormones and ends with the reproductive system. Some of you may be wondering about the reproductive system part. It shows external drawings of a fairly realistic male and a female form overlaid with an illustration of the internal organs. The fold out for this section shows the stages of development of a fetus in the womb during pregnancy.

Inside the Human Body poses and answers some interesting questions, such as “How old is your skin?” and “Why do my veins look blue if my blood is red?” I admit, I didn’t know the answer to the first one, which is that the skin replaces itself in just over one month. You can also find out what causes a sore throat, and how to find your blind spot.

If you are doing a human biology unit with middle grade students, or have a child who is learning more about his or her own body, then this is definitely a book worth considering as a resource.

Activities to learn more about cells:

The human body is made up of building blocks called cells. Different organs are composed of different types of cells, such as muscle cells or nerve cells. Within the cells are components called organelles. Some organelles are the nucleus and the mitochondria.

1. Make a model of a cell.

Obtain a labeled diagram of a cell, such as the one in the book or this one online. Enchanted Learning has a unit on animal cells.

Think of materials to make your own model. Enchanted learning has an intricate model of a cell made with jello and other edible materials.

Other possible materials are salt dough, modeling clay, paper and/or Styrofoam.

Here is a page of links to a variety of cell model ideas.

2. Cheek Cells

Cells from the inside of your cheek are easy to obtain, and mounting them on a slide gives you practice with common laboratory techniques.

If you are going to actually look at something as small as a living cell, you will need access to a microscope. If you are not familiar with microscopes, the type you will need is called a compound microscope, preferably with about 400x capability. You will also need glass slides, slide covers, and stains, which are dyes that help darken structures so that you can see them. Two common stains are iodine and methylene blue (available at fish supply stores). Always follow all safety precautions listed in the instructions of these stains and wear old clothes.

First, become familiar with the technique of making a wet mount preparation. Here is a link to a video showing how to make a wet mount slide.

Gather

  • microscope slides
  • slide covers (also called cover slip)
  • stain, such as iodine or methylene blue
  • clean cotton swabs (safer) or toothpicks
  • water
  • medicine dropper
  • water
  • tweezers (help position the slide covers)

Once you have your microscope plugged in and set up, place a few drops of water on the slide. If you are using methylene blue, it is possible to use a few drops of the stain directly on the slide without adding water first. With your mouth open, gently scrape some cells from the inside of your cheek with a toothpick or cotton swab. Swish the cells you collected into the liquid on the slide, and immediately throw the toothpick or cotton swab away.

Now position the slide cover as directed in the video, at the side of the liquid and slowly lower it. The idea is to avoid trapping air bubbles in the liquid, which interfere with viewing. If you are using iodine, place one drop of the stain to the side of the cover slip, so that it can diffuse into the water, as shown in the video.

Put the slide onto the stage of the microscope and then view at a low power. Once you have located the cells, move to a higher power to see more details.

Cheek cells are epithelial cells. You should see a cell with a nucleus that looks something like this:

Photograph from Wikimedia. (I believe the white objects outside the cell are air bubbles.) The lighter oval in the center is the nucleus. The cell is surrounded by the cell membrane and is full of cytoplasm.

Hope you have fun and let me know if you have any questions.

Inside the Human Body by Dr. Aron M. Bruhn, M.D., with illustrations by Joel Ito and Kathleen Kemly.

Reading level: Ages 9-12
Publisher: Sterling (October 5, 2010)
ISBN-10: 1402777795
ISBN-13: 978-1402777790


Other books in the Inside Series include:

Inside Dinosaurs by Andra Serlin Abramson, Jason Broughham, and Carl Mehling.


Disclosures: Book was provided for review purposes. Also, I am an affiliate for Amazon. If you click through the linked titles or ads and make a purchase, I will receive a small commission at no extra charge to you. Proceeds will be used to maintain this self-hosted blog.

Weekend Science Fun: Bat Science

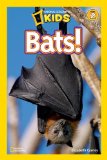
Bats are so fascinating. When the National Geographic Reader Bats by Elizabeth Carney came across my desk, I knew it was time to come up with some fun science activities to do with bats.

About the book: Bats is a reader level 2, for children 4 to 8 years old. It is full of gorgeous full-color photographs, accurate scientific information, and at the top of some pages are silly riddles and jokes that kids will love. The photograph of baby fruit bats all cuddled in blankets at a bat rescue nursery is too cute for words. This book is a great way to find out more about bats!

Activities:

1. Bat Anatomy

One of the first things you notice about bats is their large wings.

(Photo from Wikimedia)

If you look closely you can see their wing is similar to our hand. The tiny hook protruding from the top is the thumb and the long, narrow “fingers” have a thin layer of skin between them. Because of this scientists gave bats the name Chiroptera, which is Greek for “hand wing.”

Check this bat anatomy diagram for more details.

Gather:

  • paper
  • pencils
  • glue
  • toothpicks
  • Cotton balls
  • bat anatomy diagram

Have the children draw the outline of a bat (you might want to provide one to trace for really young children). Glue cotton balls where the body would go. Ask them to place their own hand over the wings, and figure out where the thumb and fingers should go. Glue toothpicks to represent the arm, elbow, thumb (a piece of toothpick), and fingers.

Older children may create a more complicated and detailed model. A helpful resource might be The Bat Book & See-Through Model by Luann Colombo and illustrated by Susan Hernday.

2. Different Kinds of Bats

Bats come in all sizes, shapes and colors. The largest are the fruit bats, in the group Megachiroptera. The largest can have a wingspan of six feet. The smallest bats belong to the group Microchiroptera. The tiny bumblebee bat has a body the size of a bumblebee.

Although the stereotype is of a bat living in a cave, bats may live in many places. One of my favorites is the Honduras white bat that makes a shelter out of plant fronds.

Take a look at some different bat species at the Bats of San Diego.

3. Bat Food

What do bats eat? A majority of bat species eat flying insects, including those pesty mosquitoes. Some eat animals such as frogs or fish. Fruit bats, as their name suggests, eat fruit.

Finger Puppet Show to Investigate Food Chains

Here’s a direct link to a .pdf download for “You’ve Gotta Eat to Live” food chain activity with moth and bat finger puppets to make from the Arizona Sonora Desert Museum.

4. How Bat’s Find Food – Echolocation

Bats are nocturnal, they are active and looking for food at night. In the darkness, the bats produce sounds. Some of the sounds are ultrasonic, which means we can not hear them. Other sounds bats make are within our hearing range.

The bats use the ultrasonic sounds to locate their food in a process known as echolocation. Their special ears allow them to pick up the echos of the sounds they make bouncing off of nearby objects. They can detect and avoid objects as small as a human hair using only sound.

Ever play the game Marco Polo? You close your eyes and try to locate other players saying “Marco Polo?” If you have, you know how difficult it is for humans to locate objects by sound.

Can you design a cupped ear extender out of a piece of paper that might help you hear sounds from around the room or further away? Look at bat ears for inspiration.

A cool science project might be to get an ultrasonic bat detector and search for bats at night.


5. Build a bat house.

In some areas you can provide a bat house for bats.

We built a bat house a few years ago, but later found out bats don’t use them in the Sonoran Desert, probably because of the heat (birds don’t use bird houses here, either). Check around for information about bats that live near you and find out whether they will use a bat house if you provide one. If so, there are instructions online how to build them.

Bat House Information

Resource:

Check out Organization for Bat Conservation for loads of information and activities.

And there are always a lot of good books about bats, including;
(Affiliate links go to Amazon)

The Bats book was provided for review.

Weekend Science Fun: Yeast

After reading yet another children’s book that identified yeast as a type of plant – an archaic classification, they are really fungi – it’s time to investigate these helpful organisms.

1. First of all, how do scientists know yeast are fungi and not plants? Obtain some baking yeast from a store. Carefully open the packet or jar and look inside. Have some plant seeds handy for comparison.

Consider the characteristics of plants:

  • They are multi-celled organisms that obtain their energy from photosynthesis.
  • They are green and contain chlorophyll.
  • They grow from seeds.

In contrast, fungi:

  • are organisms that obtain their energy from food digested externally.
  • They are not green, and do not contain chlorophyll.
  • They contain chitin, a protein found in animals.
  • Make more of themselves via spores or budding.

What color are the yeast particles in the yeast package? Are they green like plants? Even though they are not green, they still might be seeds. How would you tell? What happens when you add water to a seed? It swells up and over time, say a week or so, a small plant emerges.yeast

Try adding a teaspoon of yeast to 1/4 cup of warm water. What happens? Now add a little sugar, to serve as an energy source. What happens? What would happen if these were seeds of a plant?

Note:  Yeast organisms are actually unicellular and would be impossible to see without a microscope, so the baking yeast you examine is a processed form containing many cells.

2. Although we humans use yeast for baking or making beverages, in nature yeast are decomposers. Test the ability of yeasts to decompose common food stuffs. Gather:

  • banana (apples or bread will work too).
  • plastic bags
  • yeast

Cut the banana in half crosswise. Sprinkle 1 tsp of yeast onto one half piece of banana, and then place each half banana into separate bags. Close the bag, and leave them in a warm, dry place. Compare what happens in the banana half treated with yeast and the banana half not treated. Return twice a day and record the appearance of each half over a few days. Would the experiment be less valid if you treated one whole banana and left one whole banana untreated? Why or why not?

Compare the rates of decay to bread and apples treated with yeast to untreated samples. Interesting fact:  fruit flies don’t eat fruit as larvae, but the yeasts that grow on fruit.

Related:

  • See our previous post about blowing up a balloon with yeast. You can substitute a few Tablespoons of granulated sugar for the molasses in the experiment.
  • Also our previous post on Fungi
« Older posts Newer posts »